Blooket Quick Start Guide for Teachers: 11 Easy Steps
Do you want to make education fun for your students? Use technology to improve your teaching style. In the dynamic landscape of education, technology plays a pivotal role in transforming traditional teaching methods into interactive and engaging experiences.
One such innovative platform is Blooket, a gamified learning tool that empowers educators to create interactive games based on educational content. This quick start guide aims to assist teachers in navigating the Blooket platform, from creating an account to hosting engaging games for students.
Let’s begin Blooket quick start guide for teachers.
Blooket Quick Start Guide for Teachers
Here are 11 quick steps to host a Blooket game as a host.
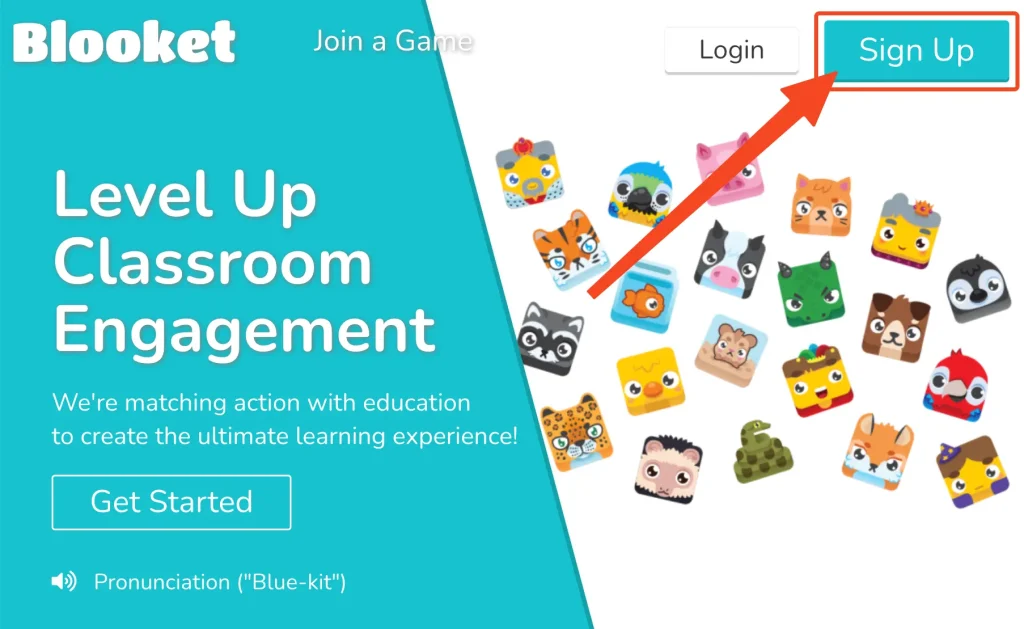
1. Sign Up for a Blooket Account
To embark on the Blooket journey, educators must first create an account on the platform. Visit Blooket.com and click on “Sign Up” to register for a free account. This simple process provides access to a wealth of educational resources and game-creation tools.
2. Find a Question Set
Blooket’s foundation lies in question sets, the building blocks for creating games. Educators can explore a vast repository of over 20 million question sets crafted by peers or opt to design their own. This step is crucial as the selected question set forms the basis of the interactive game.
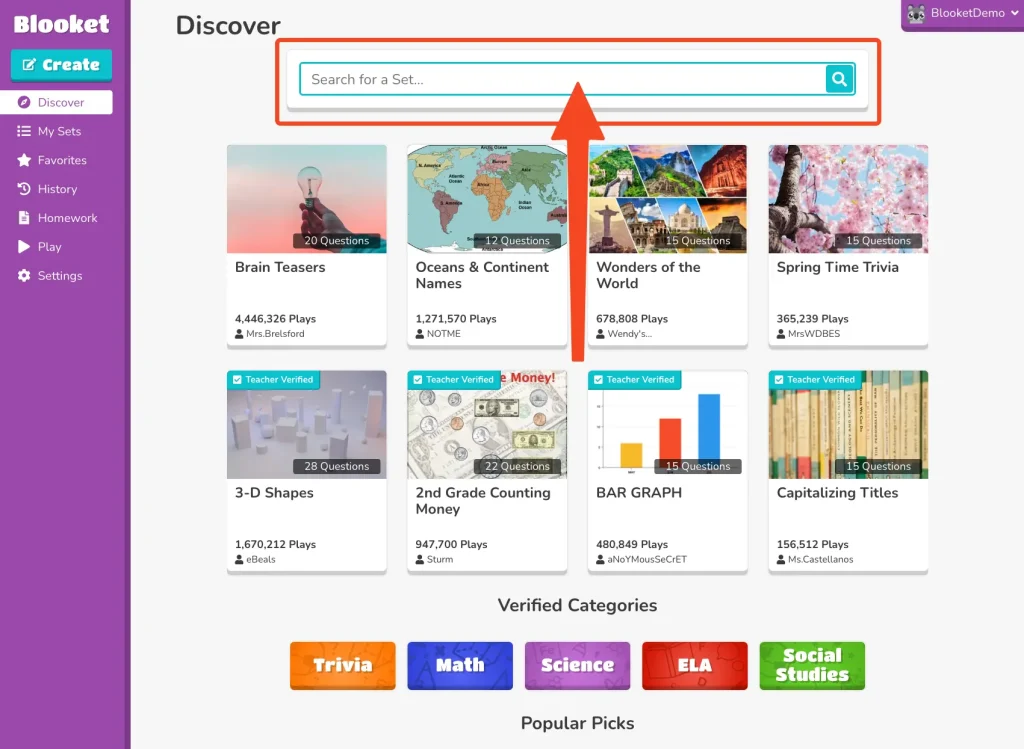
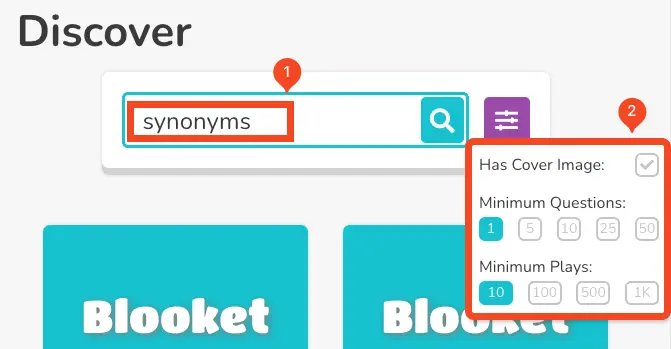
3. Search for a Set
Use the search bar to find a set that aligns with the educational objectives. Incorporate key terms such as grade level, topic, skill, or standard to streamline the search. The search filter option further refines results, ensuring that teachers discover precisely what they need.
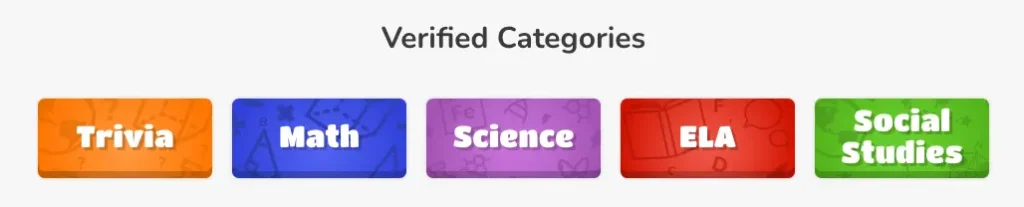
Alternatively, explore Blooket Verified sets categorized for easy navigation.
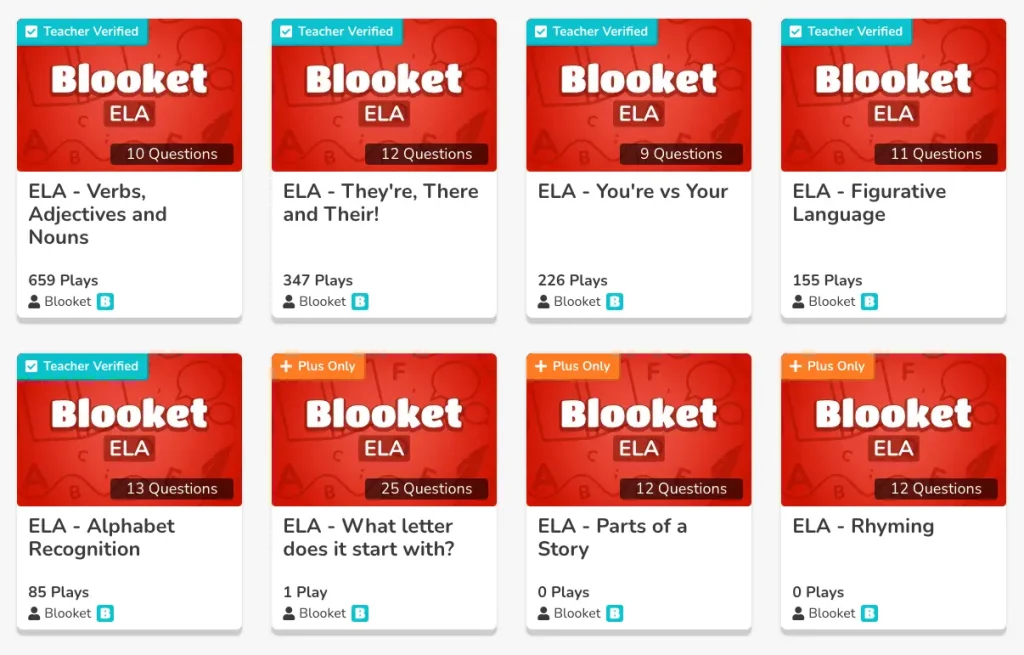
You can also find teacher-verified set in this part.
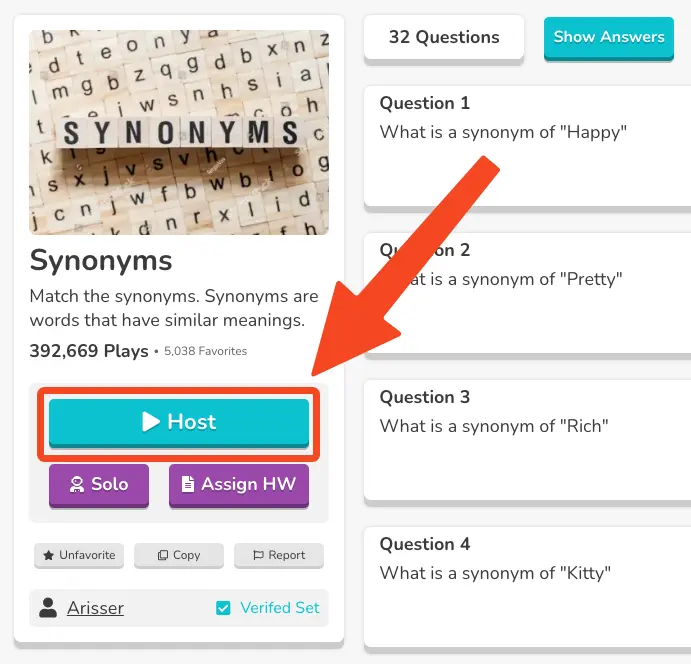
4. Click on the Set
Upon finding a suitable question set, click on it to navigate to the set page. Here, educators can review the content, ensuring it aligns with their teaching objectives.

Also Read: how to create a question set in Blooket.
5. Host a Game
With the chosen question set, click on the “Host” option to initiate the game creation process. This step is crucial for setting up a virtual or in-person interactive session.
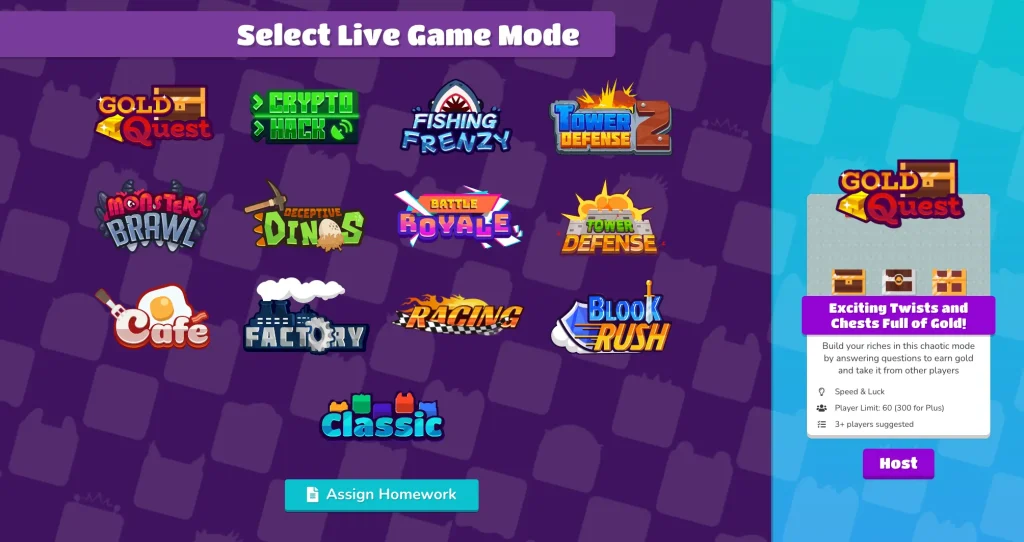
6. Select a Game Mode
Blooket offers various game modes, each catering to different learning styles and objectives. Educators can choose from modes like Tower Defense, Match, and more. This flexibility allows for a customized and engaging learning experience.
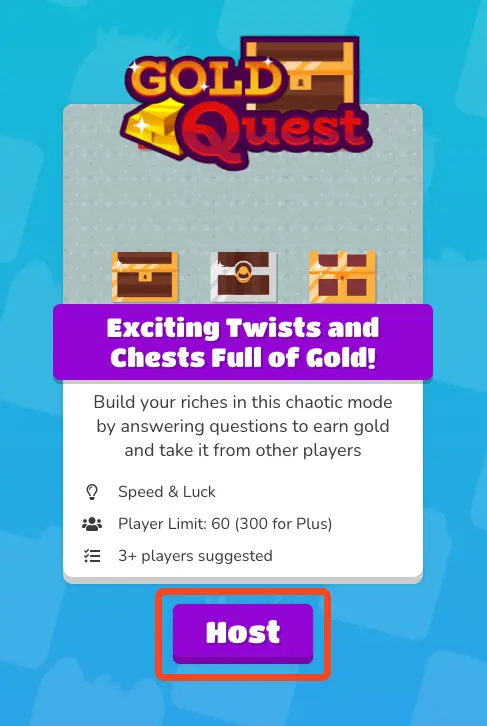
7. Click “Host
After selecting the desired game mode, click on “Host” to proceed to the next steps of game setup.
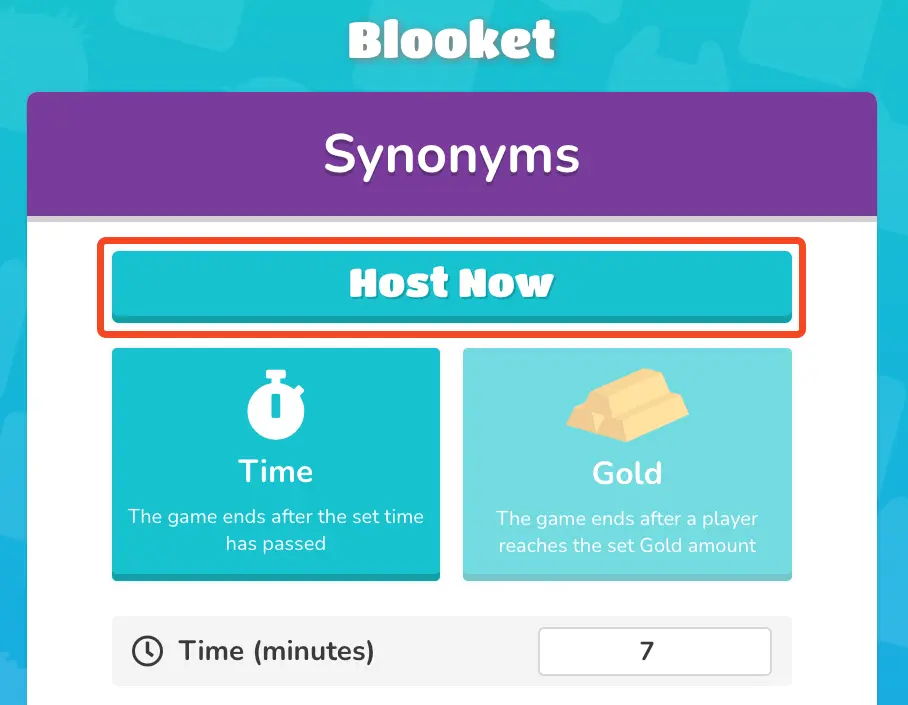
8. Adjust Settings
Customize game settings to fit specific classroom needs. This includes adjusting time limits, point systems, and other parameters to create an optimal learning environment.

9. Host Now
When all settings are configured, click on “Host Now” to launch the game. This action makes the game accessible to students, initiating an interactive and gamified learning experience.
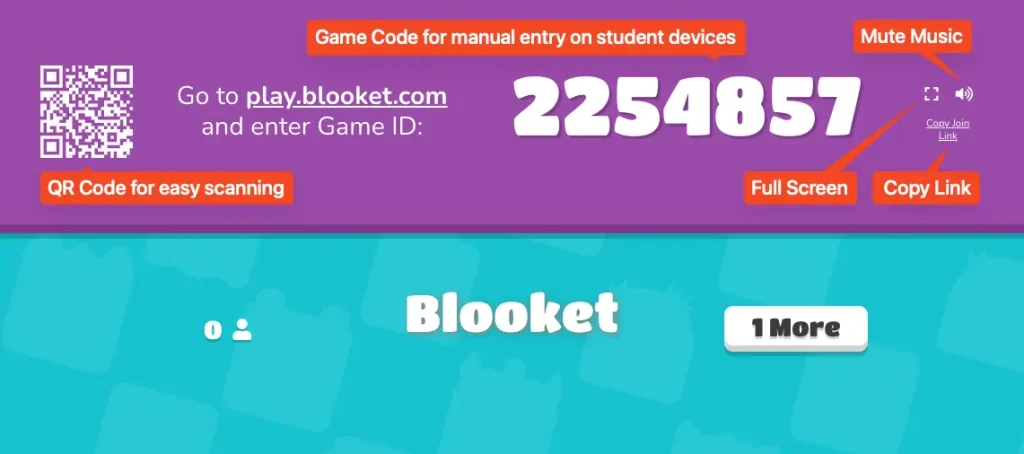
10. Instruct Students to Join
Share the game with students using one of the provided methods. Students can join by visiting play.blooket.com and entering the 6-digit game code, scanning the QR code, or clicking on a shared Join Link, making it versatile for various classroom setups, including virtual environments.
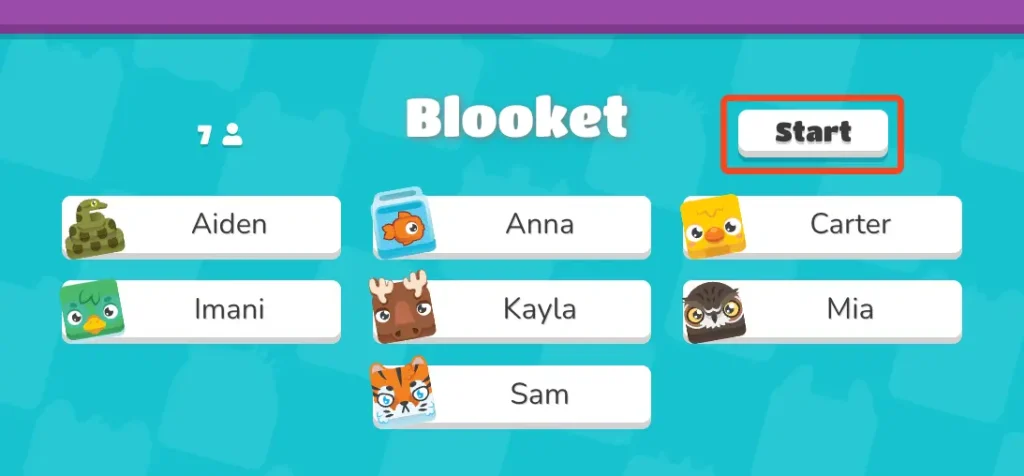
11. Start Playing
Once all students have joined the game, click on “Start” to commence the interactive session. Students can actively participate, answer questions, and compete in a gamified learning environment.
Conclusion
Blooket’s Quick Start Guide for Teachers serves as a roadmap to perfectly integrate gamified learning into classrooms, fostering student engagement and enhancing educational outcomes. By leveraging this innovative platform, educators can create a dynamic and interactive learning space that captivates students and transforms traditional lessons into memorable experiences.